fig. a: the low rider is a little higher

fig. b: Californi-vacation

fig. c: sunset kingdom

fig. d: moonrise kingdom
The trip we took to Los Angeles in December of 2019 has taken on greater and greater significance over time.
For one thing, and perhaps most importantly, that was the last real trip we took before everything took a dramatic (and traumatic) turn early in 2020.
For another, that was when our love affair with birria began in earnest.
I’d been following the development of birria hysteria south of the border for a few years now.

fig. e: “How birria tacos conquered America”
I’d read about birria establishments in Tijuana, Chicago, Los Angeles, Houston, New York, Richmond, CA, and elsewhere. iIn some ways my fascination with birria mirrored my fascination with barbacoa. In both cases, full-blown culinary explosions were taking place all across the U.S., inspiring passionate, even ecstatic, followings. In both cases, these were not trends that had made their way north of the border in any appreciable manner. Of course, it’s just a matter of time. In fact, the process is already underway.
Los Angeles had become the epicentre of the “birria boom” according to most accounts. Proximity to Tijuana, sheer range of regional Mexican regional cuisines represented (and thus varieties of birria), and dedication to Instagram and TikTok were all factors behind this phenomenon. And we were staying in Venice, in close proximity to an outpost of one of the superstars of L.A.’s birria scene: Teddy’s Red Tacos.
This is how quickly things have happened: Though birria’s roots in Tijuana date back to the 1950s, when a Poblano native imported a dish from his home region and adapted it to local tastes (and cost efficiencies), it remained a minor culinary development there as late as the mid-1980s, when one Teddy Vasquez was born. By the early 2000s, birria had gained in popularity quite significantly in Tijuana, but one stand in particular, Tacos Aarón, dominated the scene. And it wasn’t until 2015—just over five years ago—that Teddy returned to Tijuana from Los Angeles during a particularly difficult time in his life and underwent a full-on birria conversion—on a religious scale. He returned to L.A. convinced that birria would be his salvation. He delivered food via Uber and Lyft in order to raise the capital for some kitchen equipment, and soon began selling beef-shoulder birria de res out of his car, developing a following on Facebook and Instagram in the process. Soon he’d upgraded to a food truck, and now Teddy’s Red Tacos is a mini-empire, consisting of half a dozen locations—most of them trucks, all of them hugely successful—spread out across Los Angeles. The influence of Teddy’s Red Tacos is much, much wider, however, because the operation is also an online sensation. The point is: Teddy Vasquez graduated from noviciate to high priest of birria in just five short years!
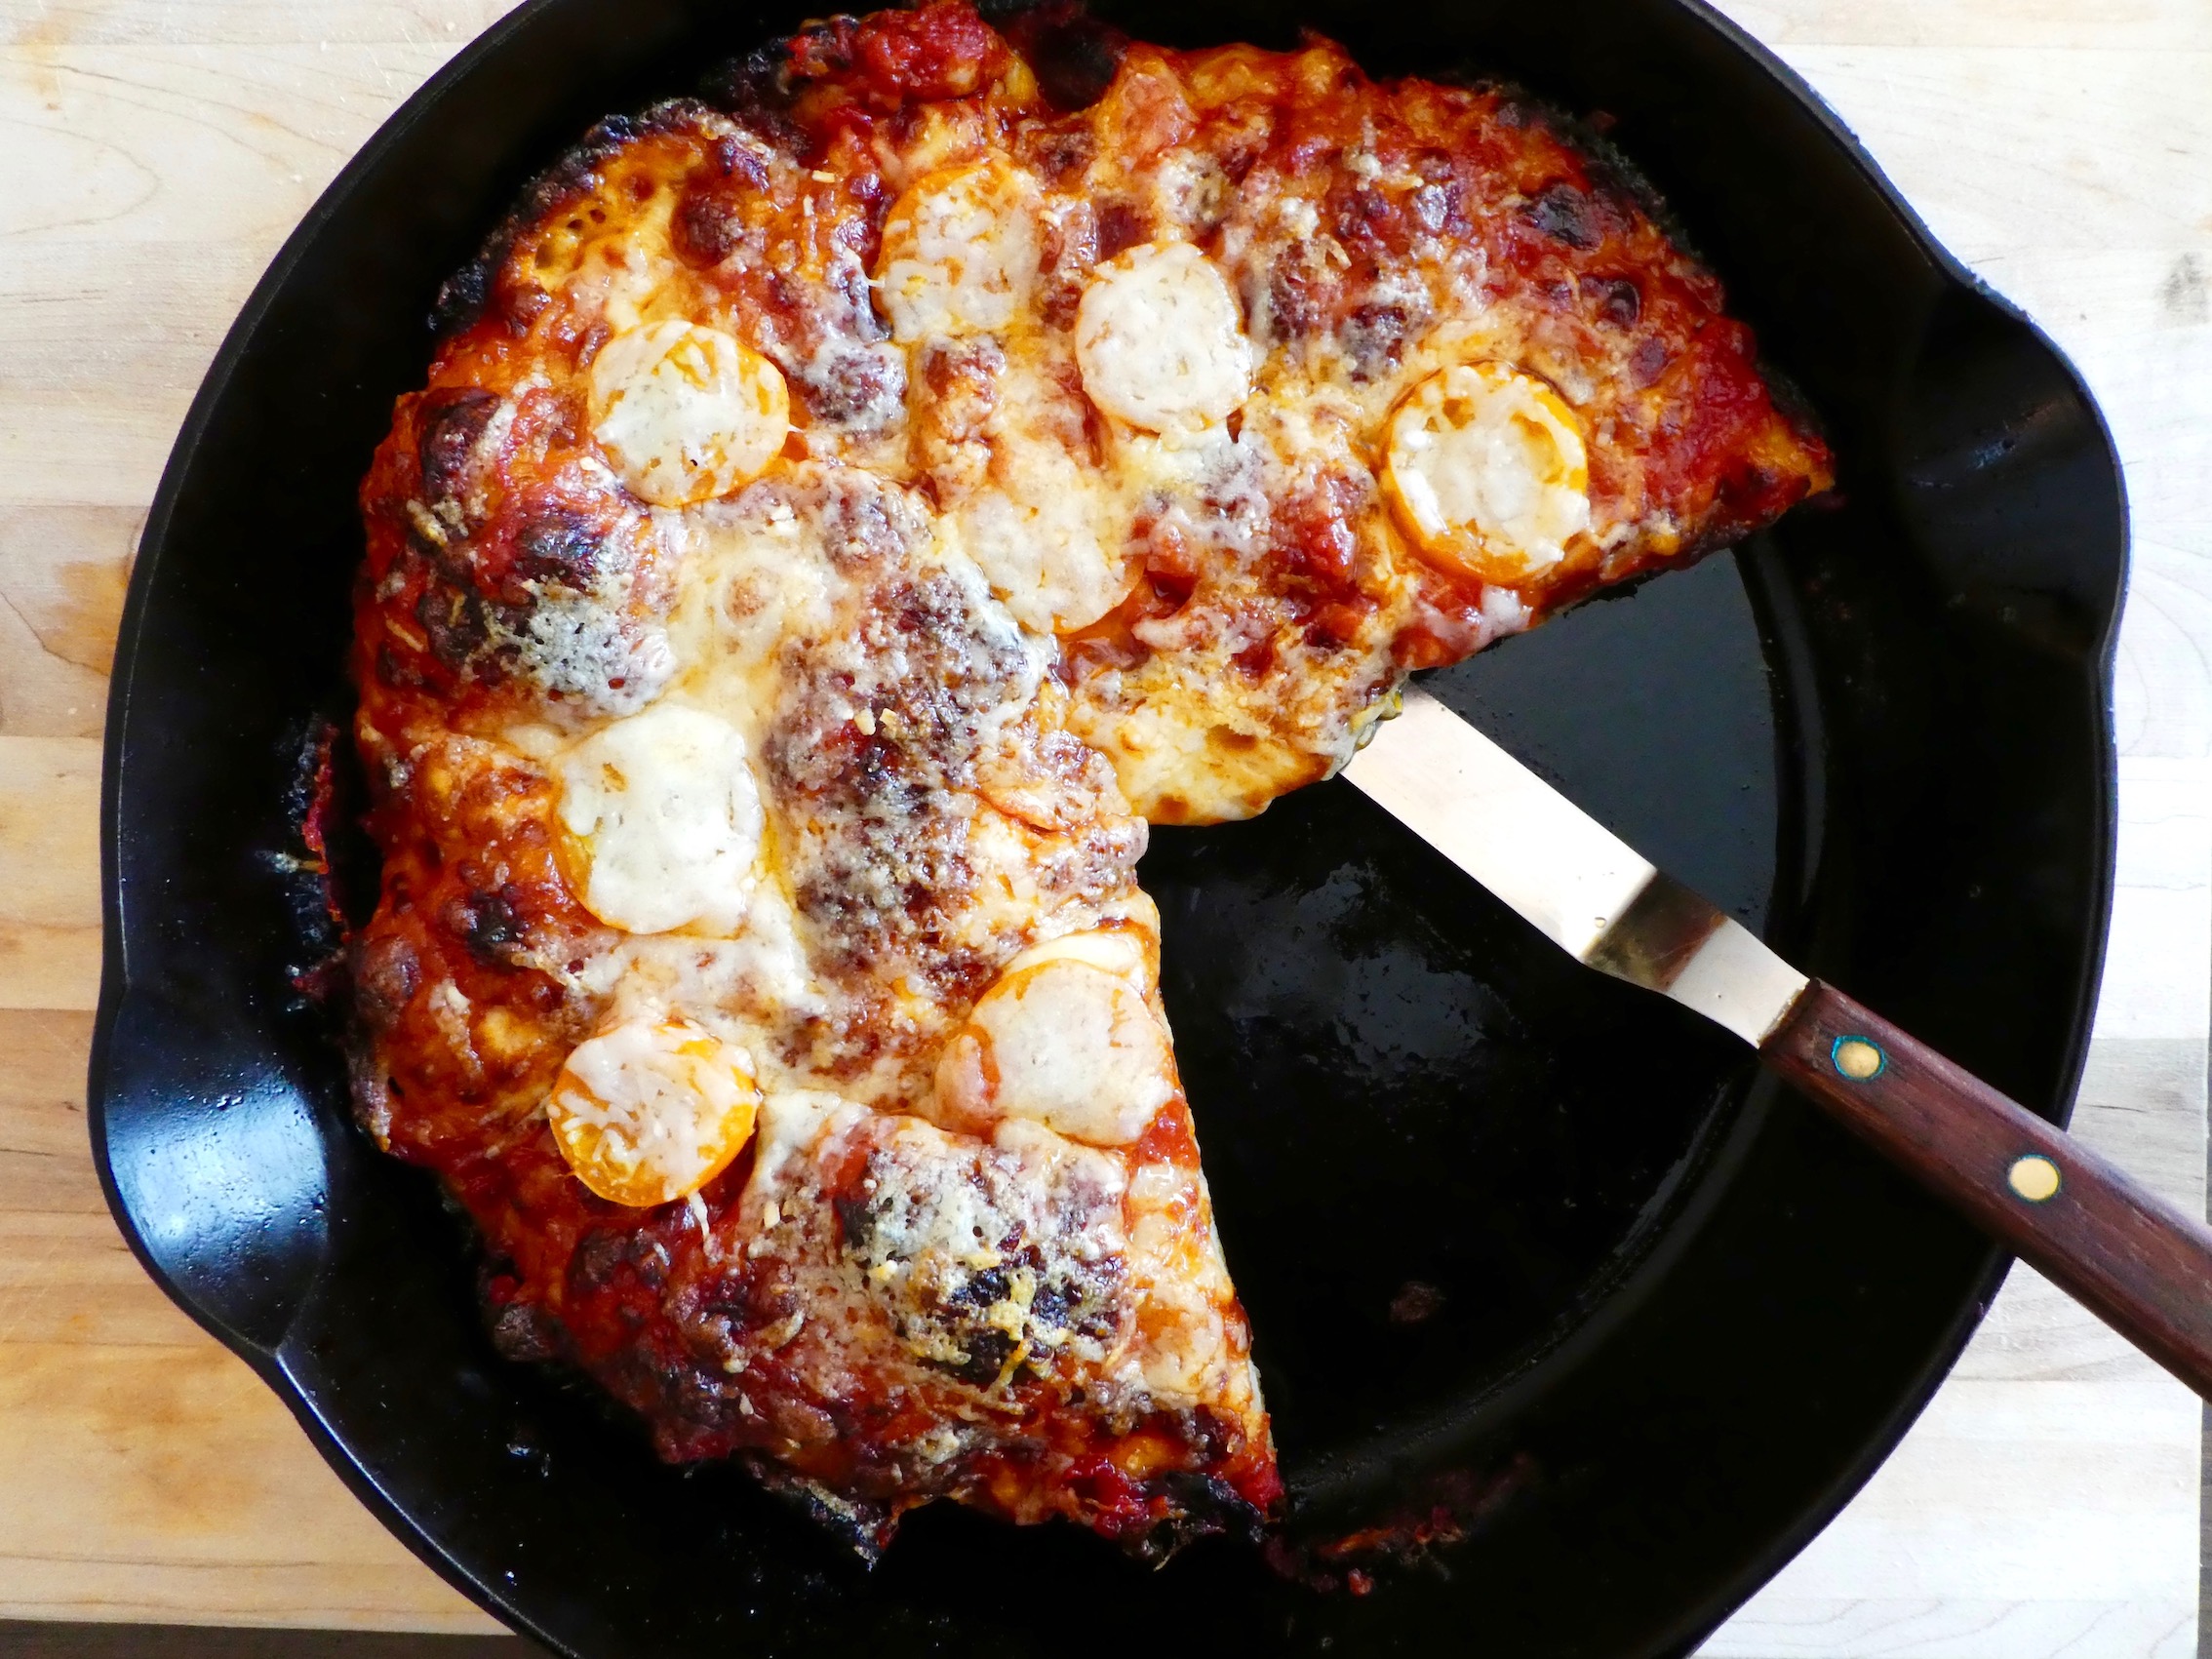
For us, one combo plate at Teddy’s was all it took. Actually, just one portion of one of Teddy’s combo plates was all it took: the quesabirria, or birria taco with cheese. The straight-up Teddy’s birria taco was already a work of art. The addition of cheese, which when dipped into the steaming container of consomé (spicy beef broth) that accompanied it (like in the photo above), became even gooier (impossibly so), even more decadent, was a masterpiece.
Anyway, at some point over the last year, with travel largely an impossibility, and nothing remotely like Teddy’s Red Tacos anywhere nearby, birria became a pandemic project around here. And it’s easy to get carried away. The range of recipes that are available in traditional resources like magazines and newspapers are already impressive. Explore Instagram and TikTok and the sources of inspiration grow exponentially.
Like all classic braises, birria is deeply satisfying to make. In fact, the aromas unleashed in our apartment each time I’ve made birria have been downright hallucinatory—the most intoxicating aromas I’ve created in the kitchen in recent memory. And not only are your best birria recipes highly addictive, but they tend to be extremely generous, and they freeze and keep well. Have a sudden hankering for a fully loaded, overstuffed birria burrito? No problem. Just grab one of those 250-ml containers of birria de res that you froze a few weeks ago, start your rice, and gently reheat it. Want to try your hand at birria ramen? or birria pizza? or birria tortellini? (This being an internet craze, the mash-ups are endless.) Same deal. You’ve already got the most important ingredient on hand.
Tejal Rao’s New York Times article “The Birria Boom Is Complicated, but Simply Delicious” from earlier this year, is a great overview of birria mania and its permutations. It also comes with a selection of tantalizing recipes, including an excellent one for birria de res from chef Josef Centeno of L.A.’s Bar Amá Although he trained in haute cuisine temples like Manresa in Los Gatos, CA, Centeno is originally from Texas, and his restaurant is a sophisticated ode to the Tex-Mex comfort food he grew up with. Birria is not a major part of his menu, but it is a staple, although it often appears in non-traditional forms, like the mushroom birria that is currently on offer. His classic birria de res at Amá, which he makes on a seasonal basis, when the temperatures are right, is based on how his grandmother made her version.
Though the present birria craze is a modern phenomenon, and is largely beef-centric, the dish and its roots go back centuries to pre-Columbian times, and involve a wide variety of meats, depending on the region of origin, much like barbacoa. As a matter of fact, both dishes are closely associated with the use of fire pits.

fig. f: “Mexico’s original celebrity chef”
Rao cites a recipe that was published in a book of regional Mexican dishes that were collected by Josefina Vélazquez de Léon—a woman Saveur named “Mexico’s original celebrity chef”—back in 1946. The recipe in question is Zacatecan and it calls for an entire sheep (!), which is then rubbed in chilies, herbs, and spices, allowed to marinate, and then placed in a (presumably large) pot, sealed tight with masa, and buried in a fire pit—not unlike barbacoa.
Where birria and barbacoa differ widely is how they’re served. In the case of birria, traditionally the dish was served in a bowl, swimming in a plentiful amount of heady consomé. Though purveyors of birria tacos and related dishes—quesabirrias, vampiros, mulitas, etc.—have gotten the lion’s share of the attention on Instagram and TikTok, this more traditional version of the dish—a stew served with corn tortillas and an assortment of simple accompaniments—remains a significant part of the “birria boom.” Rao’s article cites several places in Los Angeles alone that serve these types of birria, including Bar Amá.
And it’s this brothier, more traditional approach that we’ve been working on in the AEB test kitchen. The first recipe we tried was Centeno’s birria de res, as featured in The New York Times (and adapted by Rao). Even though Rao gives considerable attention to the birria tacos craze (as you’d expect), it’s Centeno’s version that serves as the lead image for her article.

fig. g: birria de res and the “birria boom”
And in a rare instance of truth in advertising, Centeno’s recipe turns out exactly like this when you actually make it. We made our own corn tortillas, too, so the overall arrangement was very similar to what you see in the photo above.
This birria de res is really great, and a great place to start if you’ve never made this dish. The consomé is rich and seductive, the beef luscious. It’s everything you want in a beef stew—and more! This is a recipe that gives and gives and gives. The leftovers are heavenly, and it freezes very well. You’ll probably end up with more consomé than meat, but that’s a good thing. Trust me, it will come in very handy when it comes to dressing up a burrito, for instance.
A couple of months later, just before Easter, our local butcher, Aliments Viens, advertised that they’d gotten a nice shipment of Quebec lamb. I remembered a recipe I’d come across years ago in an issue of Bon Appétit that was originally created with goat in mind, but had been adapted for lamb (recalling Vélazquez de Léon’s recipe mentioned above). So I called Aliments Viens, and asked them to put a shoulder aside for me.
The recipe in question came courtesy of a birria specialist restaurant in Chicago, Birrieria Zaragoza, but it’s based on a version that has its origins in the Zaragoza family’s hometown, La Barca, in Mexico’s Jalisco state. It was one of the very first birria recipes to really catch my eye. I’d been meaning to make it for years. Suddenly I had all the inspiration I needed: I was in the midst of my own personal birria craze, I had access to fresh, locally raised lamb shoulder, and it was Easter. I couldn’t think of a better rendition of the paschal lamb—a spicy, blissed-out version that was both braised and roasted, and oh-so giving. Once again, the results were sensational—a true show-stopper.
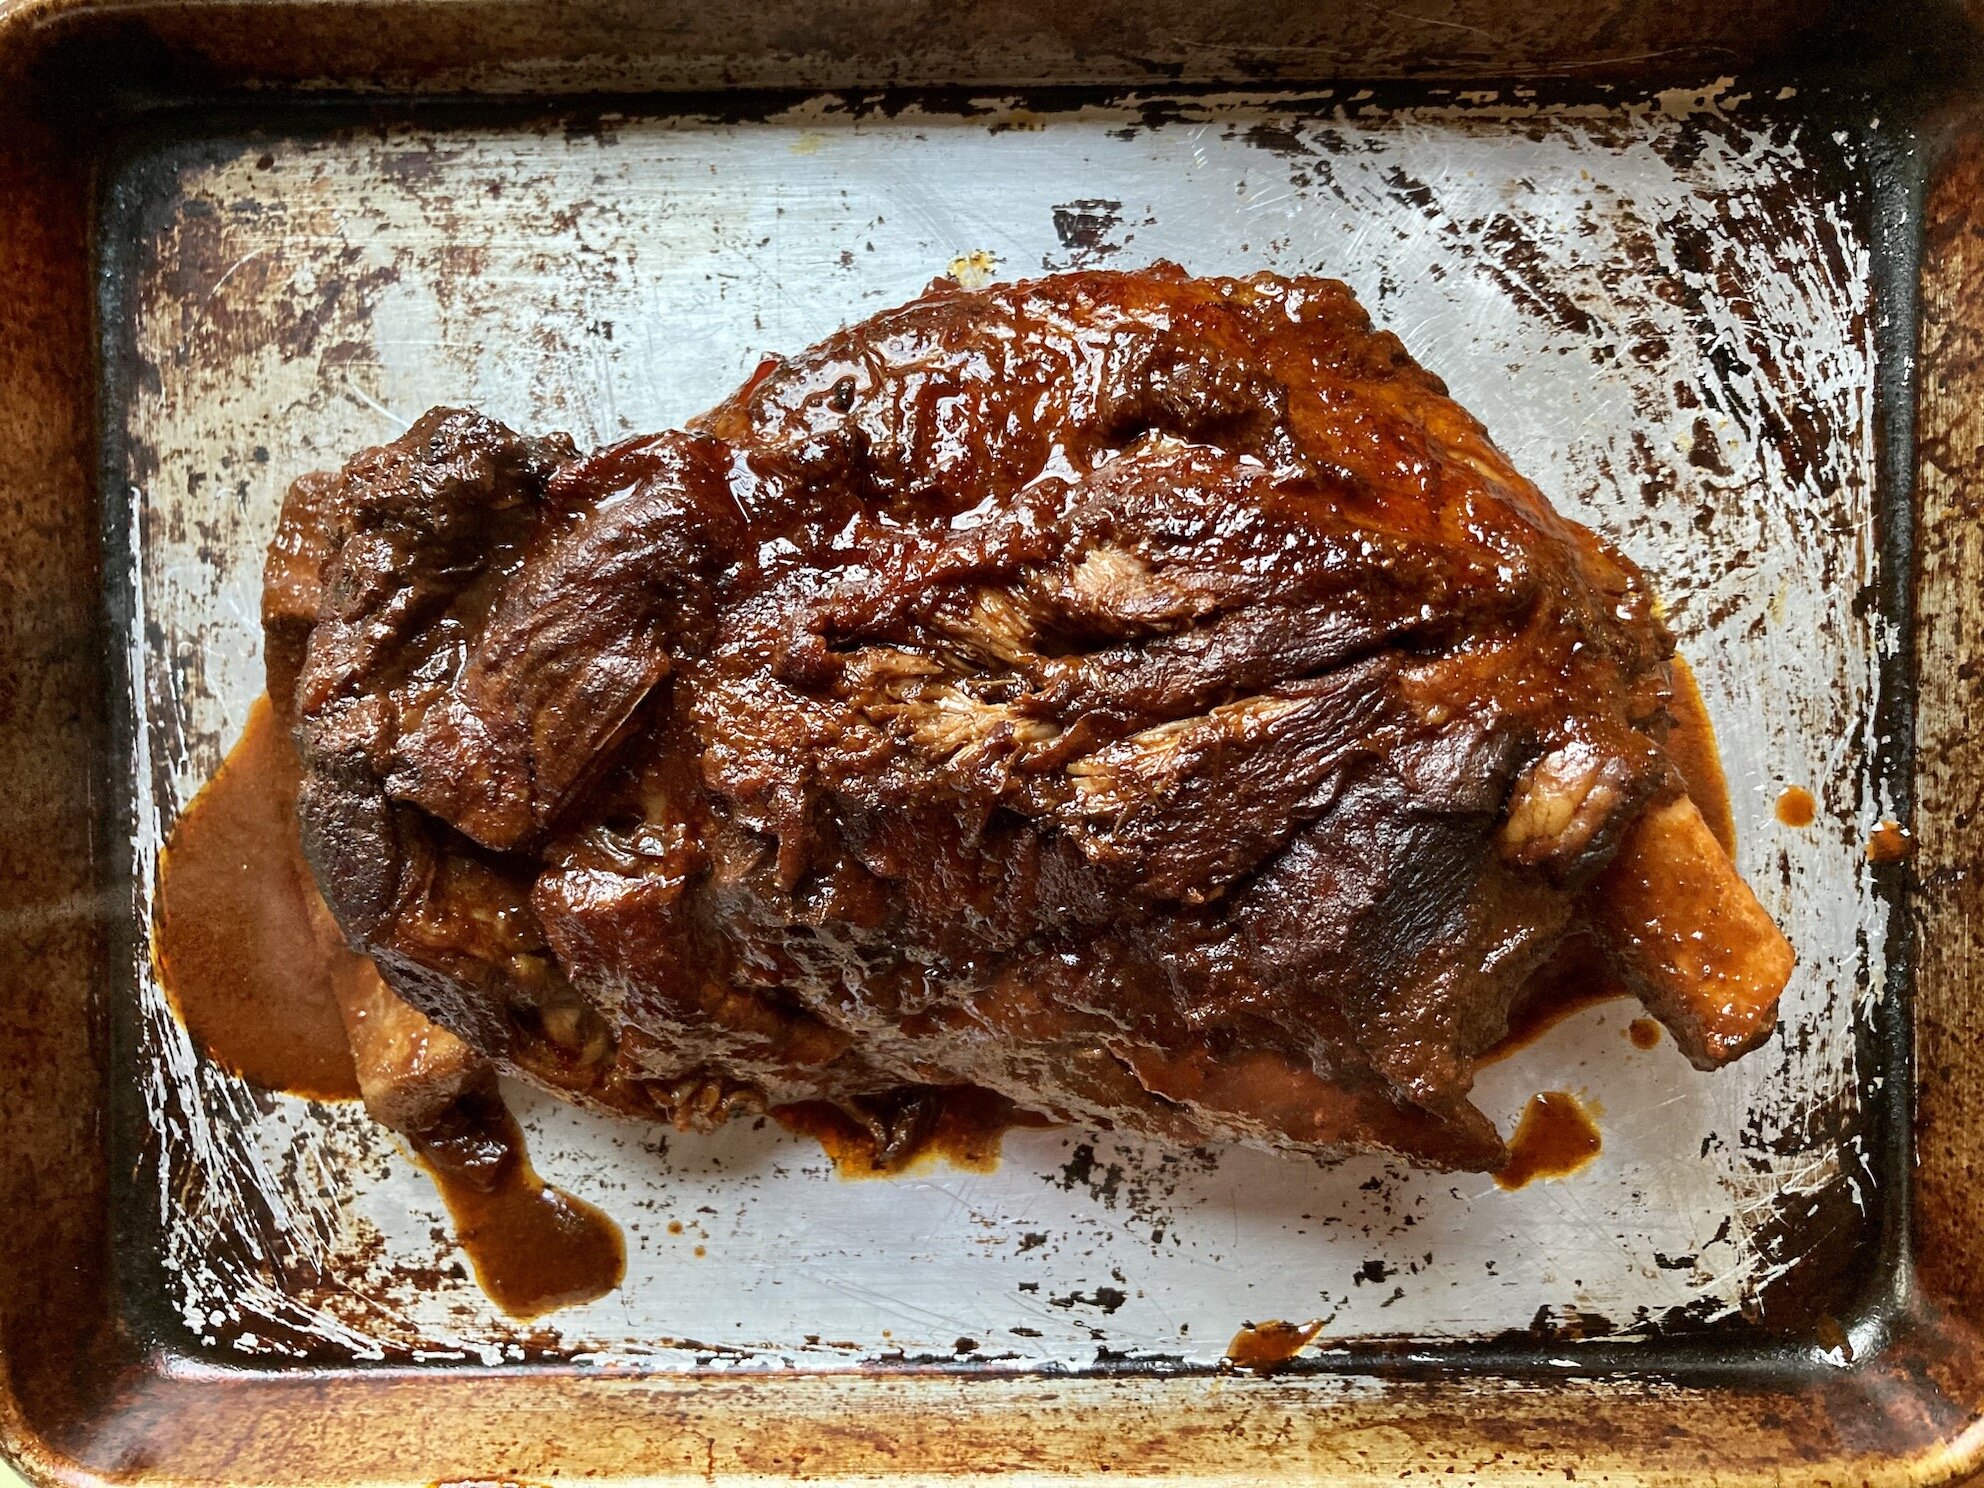
fig. h: braised lamb shoulder

fig. i: roasted lamb shoulder
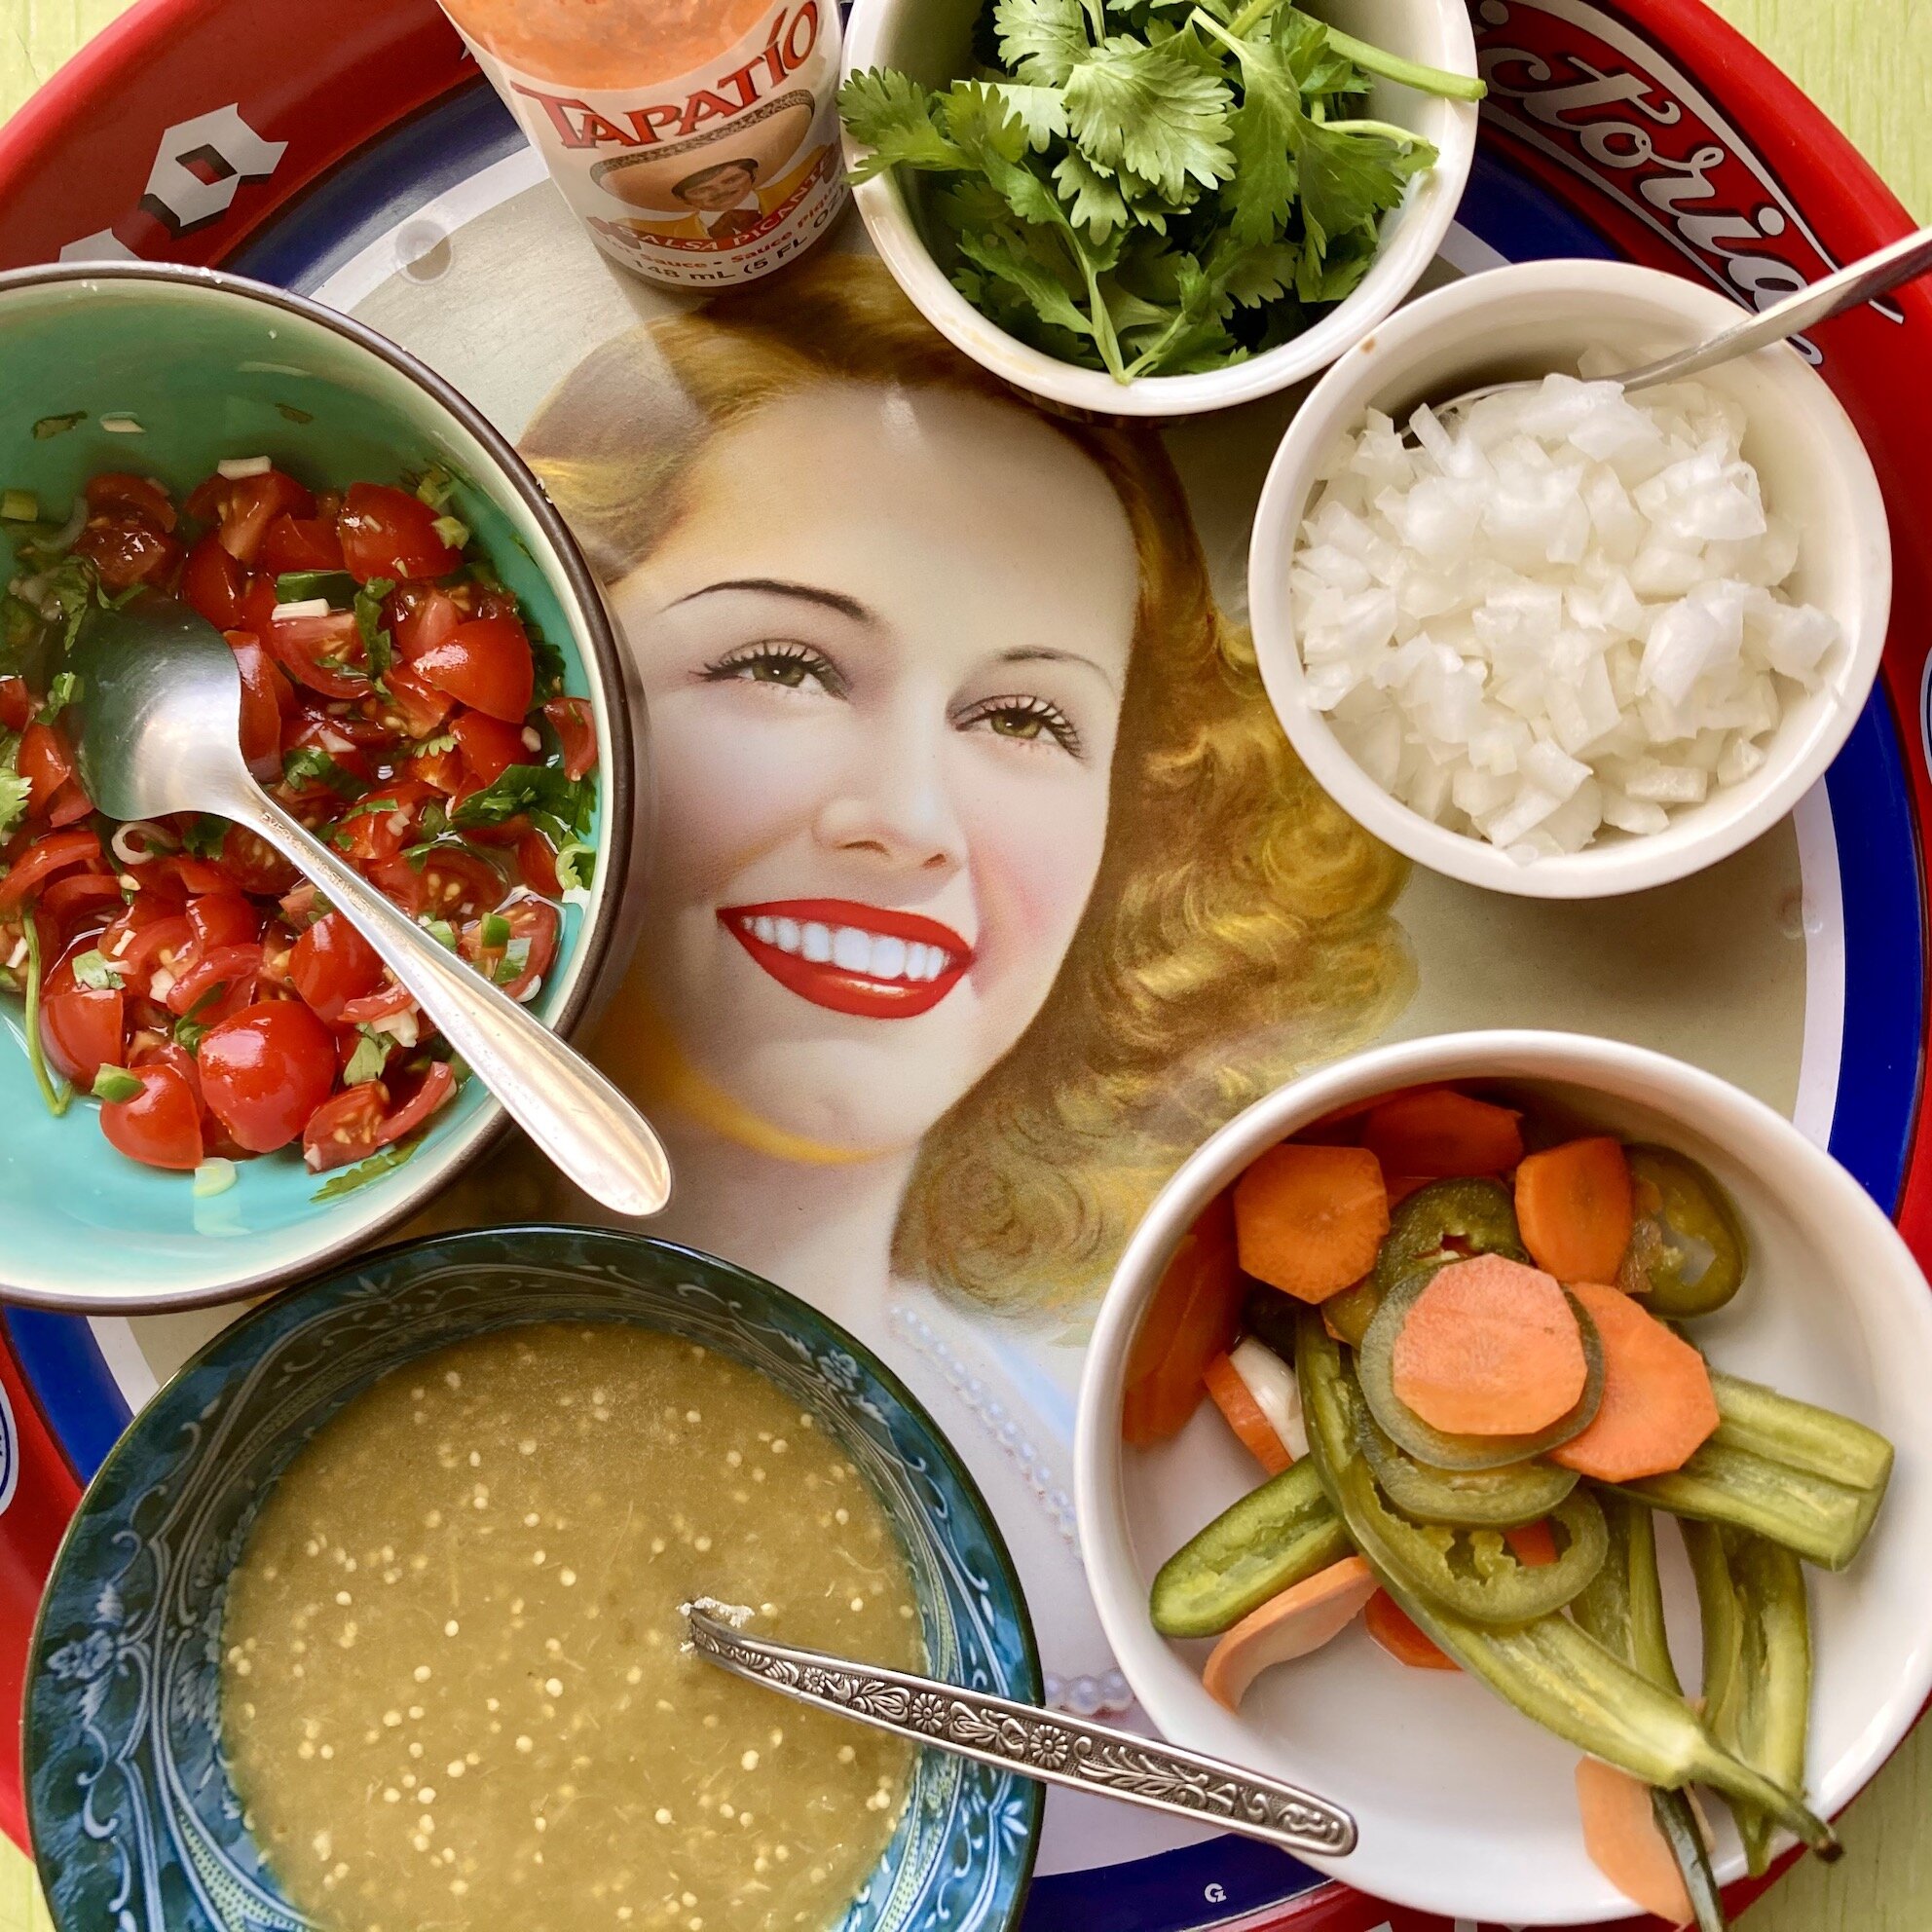
fig. j: all the fixings
Braised Lamb Birria
4 ounces ancho chiles (about 10), seeds removed 1⁄2 cup raw peanuts
11⁄2 teaspoons cumin seeds
1 teaspoon black peppercorns
2 cloves garlic, peeled
1⁄2 teaspoon ground cinnamon
1⁄4 disk Abuelita Mexican chocolate or 11⁄2 ounces dark chocolate
2 tablespoons vegetable oil
5 pounds bone-in goat or lamb shoulder
Kosher salt
2 bay leaves
2 chiles de árbol, seeds removed
1⁄2 15-ounce can fire-roasted tomatoes
4 cups low-sodium chicken broth, preferably homemade
1⁄2 teaspoon dried oregano
Accompaniments: Chopped white onion, chopped cilantro, lime wedges, and warm corn tortillas (for serving)
Special equipment: a mortar and pestle or spice mill
Preheat your oven to 275° F. Bring ancho chiles and 4 cups water to a boil over medium-high. Remove from heat and let cool.
Meanwhile, toast peanuts on a rimmed baking sheet, tossing once, until golden brown, 15–20 minutes. Let cool.
Turn the oven down to 250º F.
Toast the cumin seeds and peppercorns in a dry small skillet, tossing occasionally, until very fragrant, about 2 minutes. Let them cool, then finely grind them together in a spice mill or with mortar and pestle, along with the cinnamon.
Purée the ancho chiles and soaking liquid, peanuts, spice mixture, garlic, and chocolate in a blender until smooth. Strain through a fine-mesh sieve into a Dutch oven or another large heavy pot, reserving any solids. Return the solids in a sieve to the blender and add 3 cups water. Process until smooth and strain back into Dutch oven; discard any solids.
Heat the oil in a large skillet over medium-high. Season meat generously with salt. Cook, turning occasionally, until browned all over, 12–15 minutes total. Carefully add meat to Dutch oven and add bay leaves. Bring liquid to a simmer over medium-high. As soon as it begins to bubble, lower the heat, cover the pan tightly with foil, then place lid on top. Place the Dutch oven in the oven and braise the meat until it shrinks off of bones and is fork-tender, 3–3 1⁄2 hours (check periodically to make sure liquid is at a gentle simmer).
Meanwhile, purée the chiles de árbol, tomatoes, broth, and oregano in a clean blender until smooth. Strain through a clean sieve into a large saucepan and bring to a simmer over medium heat; cook 10 minutes to let the flavours meld. Season with salt; keep this sauce warm.
Increase the temperature of the oven to 400°. Let the meat cool, uncovered, in braising liquid 30 minutes. Transfer meat to a rimmed baking sheet and roast until edges begin to brown, 13–17 minutes. Pull or slice meat into servings. Divide among shallow bowls along with tomato-chile sauce.
Serve meat with onion, cilantro, lime wedges, and tortillas alongside.
[Serves 8 generously, or makes some wonderful leftovers]
{Based very closely on a recipe from Jonathan Zaragoza of Birrieria Zaragoza in Chicago}
As you can see in the photo above, in addition to the onion, cilantro, and the lime wedges and tortillas (unpictured), I made some pico de gallo, some salsa verde, and some pickled serranos to complete the scene. Sour cream and Tapatio were also served, just in case needed someone needed even more layers of taste sensation. What you can’t see, is just how elegant this version is. The meat is deeply roasted, remarkably tender, and extraordinarily flavourful, and it’s served in a pool of thin, but incredibly tasty broth (the “tomato-chile sauce”). The tacos that result, if you’re so inclined, are outstanding. It was hard for me to imagine a better Easter meal. Birria for the win, once again!
For the moment at least, it’s birria’s world, and some of us are lucky enough to live in it.
aj