It's a Disgrace

When we were kids, my sister and I were fans of Tomie dePaola’s Strega Nona. Who wasn’t back then? Back in the freewheelin’ '70s. Back before the conservative movement had launched its Inquisition to purge children’s literature of anything that might not be in step with its radical Christian fundamentalism. Back before even Strega Nona came under scrutiny. The book had just won a Caldecott Medal and had quickly become a beloved classic of children’s libraries across America. Of course, I had extra reason to be on board—Strega Nona’s assistant was a guy who went by the name of Big Anthony. Cool handle, right?

fig. a: Nona & Tony

Anyway, recently I found myself thinking about good ole Strega Nona and her witchy ways again for the first time in ages when I came across a tantalizing, revelatory recipe. Why Strega Nona?

fig. b: Nona knows best

Well, it had something to do with the fact that it was a pasta dish that came with a “colourful” Southern Italian name, not unlike Strega Nona (basically “Grandma Witch”). Plus, you don’t need spells or a magic pasta pot to make it, but the dish is rather magical.

The recipe in question was for Rigatoni alla Disgraziata—”the poor wretch’s rigatoni.” (You’ll notice that, as they always are, this pasta dish is gendered feminine, so the “poor wretch” in question is a woman. That didn’t stop me from identifying with her. I mean, Big Anthony didn’t have any hesitations about hanging out with Strega Nona, did he?) The dish is a classic of the Sicilian repertoire, but I’d be surprised if variations aren’t also found in other parts of Southern Italy (like Calabria, Strega Nona’s home region), because it’s basically a simple, honest, and satisfying eggplant pasta dish, a “peasant’s dish,” a prime example of cucina povera. This particular version involves some cheese, but the breadcrumbs that are essential to its preparation would often be used as a substitute for cheese in poorer households. The two vegetables necessary to make the dish are eggplant and tomatoes, staples that virtually every Sicilian family would have had on hand (or would have easily been able to access, one way or another).

fig. c: eggplant & tomatoes

Use the best eggplants and tomatoes you can find—preferably out of your own garden—but the bottom line is this is cucina povera—the cuisine of the poor and of the frugal—use what you have. In my case, I found some gorgeous organic eggplant at the market, but I wasn’t so lucky with tomatoes, so I made do with canned ones.

And while the recipe that I used as a model was for rigatoni, I substituted in busiata instead, because that’s what I had on hand, because they hail from Sicily (Trapani and environs in Western Siciliy, to be specific, where they’re often used to make Busiate alla Trapanese), and because their worm-like shape seemed appropriate to the dish in question (and ideal for the lead-up to Hallowe’en).

figs. d & e: Busiata di Sicilia

My source was a beaten-up old copy of Saveur Cooks Authentic Italian (2001), from the heyday of the beloved magazine. It’s amazing what turns up again when you move, as I did recently, and it’s amazing how well a good cookbook (just like a good children’s book) stands the test of time. Now that my knowledge of Italian cuisine has expanded, now that I’ve spent a little bit more time in Italy, this collection of recipes seems even more vital than it did in the early 2000s. Its cucina povera game was always strong, however, something which was a distinct bonus back when I was a graduate student and which always endeared me to it. Why I’d never tried making Rigatoni alla Disgraziata is a mystery to me.

The technique that’s featured here and that I found “revelatory” is a simple one for preparing eggplant. Eggplant is famously difficult for so many home cooks who don’t come from a tradition of preparing, consuming, and enjoying eggplant. Sure, you’ve read that certain eggplant dishes are considered the pinnacle of vegetable cookery throughout the the Mediterranean region and beyond, but the issue of even choosing nice eggplants can be daunting for many, let alone transforming them into something majestic. And god knows improperly cooked eggplant is a horror.

In this case, I started with Japanese-style eggplants, which are often a safer bet than larger globe eggplants because they’re less seedy and they cook up quicker. The fact that these were local and organic and that I had great faith in the farm that raised them made them an even better bet.

Cubing the eggplants, generously salting and tossing the cubes in a colander, and allowing them to “sweat” for an hour or so is a standard method for removing the bitterness of untreated eggplant. Many recipes that involve Japanese eggplant don’t call for this step, but you still may want to go this route just to be sure (I did).

But the genius of the recipe has to do with pan-frying the eggplant in a generous amount of olive oil before it gets anywhere near a sauce. The idea is to transform the cubes into golden little jewels of flavour that are lightly crispy on the outside and positively melty inside. By the time this step is completed, the eggplant is already delicious, but it’s ready to become even more so when tossed with your sauce, your pasta, and your cheese.

This technique is useful in a wide range of contexts and recipes. For instance, Michelle has been using a variation on this technique (she chops the eggplants differently and cooks them in a different type of oil) for some of her Japanese dishes for years. Like I said, once you’ve prepared the eggplant in this manner and seasoned them, they’re already delicious, anything else you do to them is extra.

But in this case, the eggplant formed the basis of a rustic pasta dish:

Busiate alla Disgraziata

3-5 small Japanese eggplants, or 2 medium globe eggplants, trimmed and cut into cubes

Kosher salt

1/2 cup plus 2 tbsp extra-virgin olive oil

1 cup fresh bread crumbs

1 lb busiata or rigatoni

1/4 tsp red pepper flakes

2 cups tomato sauce, preferably homemade

1/4 cup grated pecorino or ricotta salata

freshly grated Pamegiano-Reggiano

Put the eggplant in a colander, sprinkle liberally with salt, and toss to coat well. Allow to drain for 1 hour to “sweat” and extract bitterness. Rinse the eggplant and pat dry with a clean kitchen towel or paper towel.

Heat 2 tbsp of olive oil in a large, heavy skillet (I used a 10” cast-iron one) over medium-high heat. Add bread crumbs and cook, stirring, until golden, about 2-3 minutes. Transfer to a bowl and set aside.

Wipe out the skillet with paper towel, add remaining 1/2 cup* olive oil, and re-heat over medium-high heat. Add half the eggplant and cook, stirring and flipping the cubes often, until golden, 8-10 minutes. Transfer eggplant with a slotted spoon to a large bowl and season to taste with salt. Repeat process with remaining eggplant.

Cook past in a large pot of boiling generously salted water until al dente. Add red pepper flakes to tomato sauce in a small pot and warm over medium heat, 4-5 minutes. Drain pasta in a colander and add to bowl with eggplant. Add tomato sauce, pecorino or ricotta salata, and bread crumbs and toss well.

Serve sprinkled with Parmigiano Reggiano, accompanied with a glass of red wine, some chili oil, and a green salad.

[Based very closely on a recipe from Saveur Cooks Authentic Italian (2001), by the Editors of Saveur Magazine]

The final product should look something like this:

fig. f: Busiate alla Disgraziata

I found it deeply satisfying, perfect for the late harvest season, and not a disgrace in the least. Quite the contrary. To me it’s quite beautiful, and I wish I had a magic pasta pot that was capable of producing vast quantities of this utterly delicious dish. But even more important is the magical transformation that is at the heart of this recipe, and that blesses it with heart. Like all great cucina povera—like all great “peasant food,” in general—it’s a dish that glories in creating “something” out of “nothing”—something wonderful.

Big Anthony

  • Note: the original recipe calls for 1 cup of olive oil. If you’re using an even larger skillet, you may need to use more olive oil than I did—up to 1 cup. But for a 10” skillet, I found 1/2 cup was ideal.

Sausage Fest


Hands up: how many of you out there have encountered difficulties cooking sausages over a charcoal grill?

There’s certainly no need to feel ashamed. It’s a common issue.

Typical problems:

  • Sometimes your sausages cook too quickly on the outside, but not on the inside.

  • Other times they burst and spill their precious juices all over your coals, drying up and causing flare-ups.

  • And then there are times when you leave them sitting on a fire too long and they dry up and get shrivelled and tough.

Luckily, there is a solution, and it’s a pretty foolproof one, too.

A couple of years ago I became a convert to the “Simmered ‘n’ Grilled” sausage method J. Kenji López-Alt developed for Serious Eats. The idea here is to create a moist bed for the sausages that will allow them to cook more gently while imparting them with flavour.

So, if you’re cooking German-style sausages like brats or wieners, you might provide them with a bed of sauerkraut moistened with beer or wine. You place your mixture in disposable—but reusable!—foil pans, you nestle your sausages on top, and you place your pans over the coals in a two-zone barbecue. When the liquid begins to bubble, move the pans over to the cool side of the barbecue. It will likely take about 15-20 minutes for your sausages to cook properly, but that will allow the sausages and the bed of sauerkraut to commingle. Keep your meat thermometer handy. After about 15-20 minutes, check their temperature—you’re looking for an ideal temperature of 150º F.

At that point, your sausages are ready to be moved to the hot side of the grill so you can crisp them up and apply a perfect char to them. This process will be quick—a couple of minutes max—and when you’re done, the sausages will be gorgeous, juicy, and supremely flavourful.

In my case, I was cooking Spicy Italian Sausages with Fennel, so I went the iconic route and accompanied them with onions and sweet peppers. But I also had some gorgeous organic Japanese eggplants, so I quartered them lengthwise, chopped them up, and added them to the trays too. I also added a large clove of garlic to each tray. As for my moistening agent, I added some homemade chicken broth.

onions, peppers.jpeg

Because of the eggplants, I started the trays on the grill without the sausages for about 15-20 minutes to give the veggies a head start. Then I added the sausages and followed the Serious Eats method.

IMG_2691.jpeg

Lo and behold, in about 20 minutes, my sausages had reached temperature and were ready for the finishing touches. So I moved them over the coals, and voilà! After a couple of minutes, they were perfect, so I placed them back in their trays and brought them inside.

IMG_2693.jpeg

These sausages, together with the onions, peppers, and eggplant would be phenomenal stuffed inside an Italian roll. An Italian-American street food classic.

But on this particular occasion I had the idea of tossing them with some pasta and Parmesan cheese and serving it in a bowl with some chili oil drizzled over top. It was exactly what I was looking for.

aj

Conjuring Congee, once again

This recipe from Danny Bowien is one that first appeared in “…an endless banquet” way back in 2013—in an entirely different era—but the recipe itself is a keeper, and it’s one that we’ve returned to again and again, especially around this time of year. In fact, the first time it appeared in these pages was on February 24, 2013.

Our latest batch of congee, made just last week, was a response to winter 2021, out of a need for the kind of comfort only chicken soups of all kinds can offer—because that’s essentially what this version is: a supremely comforting, even reassuring chicken soup. But it was also a response to a recent batch of chili-crisp that I made, one that was just begging to be drizzled over a steaming bowl of congee with all the trimmings (or at least some of them).

fig. a:  AEB chili-crisp

fig. a: AEB chili-crisp

In addition to the chili-crisp, we dressed our bowls of congee with an assortment of vegetable and herbal accompaniments: simple stir-fried cabbage, simple stir-fried shiitake and cremini mushrooms, chopped scallions, cilantro, an oil-fried egg, and toasted sesame seeds.

If you’ve never made congee before, it’s an incredibly nourishing meal. It’s easy to feed a large crowd with it (as many as 10-12), but it’s also great for a small household—like ours—because the leftovers are equally phenomenal and it freezes well. You could scale back the recipe, but unless you’re without freezer space or you live in a temperate climate and don’t have access to an “outdoor freezer” like we do here in Montreal, what’s the point? I guarantee that you’ll be thrilled to have extra portions on hand in the coming days and weeks. I certainly have been. When I had a bowl for lunch the other day, this is what my simplified version looked like:

fig. b:  chicken congee, cabbage, cilantro, chili-crisp

fig. b: chicken congee, cabbage, cilantro, chili-crisp

Though this particular recipe is all about the chicken—it has everything to do with the wonderfully silky texture that is created as the rice cooks with a cheesecloth-bound chicken suspended in it, as well as the lovely perfumed qualities the chicken takes on as it is poached in the rice—it’s quite possible to make a delicious vegetarian (vegan, actually) version of congee. Just cook the rice in a flavourful and highly umami-rich vegetable broth (one that makes great use of dried shiitake mushrooms, say). When Michelle used to prepare congee at the Foodlab years ago, she did exactly that. Their congee was entirely vegan, as were many of the topping options—and all the more popular for it. And recently I’ve seen another Danny Bowien congee recipe, one for an entirely vegan (or at least easily vegan-ized) kabocha squash version, kicking around on the internet.

Lastly, it’s my understanding that congee is not a traditional offering during lunar new year celebrations. It’s too simple. It’s not considered festive enough. But as many people have noted, the fact that 2021 is the Year of the Ox seems somehow appropriate in the midst of an ongoing global pandemic, given the fact that this astrological sign has everything to do with resilience. And the ox is nothing if not a reliable animal, of course. So now might perfect time for congee: it’s as reliable and comforting a dish as they come, and it’s the kind of recipe that makes for an especially tasty and satisfying show of resilience.

Without any further ado, here’s our AEB take on Danny Bowien’s congee recipe, one that first appeared in the “Chinatown” issue of Lucky Peach back in the fall of 2012:

Chicken Congee

1 whole chicken, preferably with head and feet
1 celery stalk
1 carrot
2 cups white rice
8 qts water
cheesecloth
2 chopsticks

toppings of your choice (such as toasted sesame seeds, chopped cilantro, egg yolks, salmon roe, smoked eel, sea urchin, etc.)

Salt the chicken heavily inside and outside the cavity. Make sure you rub salt under the wings. Stuff the cavity with the carrot and celery stalk. Refrigerate overnight.

Bundle the chicken in a large piece of cheesecloth and tie it off. The cheesecloth needs to be big enough that you'll be able to tie the excess cloth to the side of a stockpot in a knot.

Toast the rice in a dry stockpot over medium heat. Don't rinse the rice first. Here, you want the starches on the surface of the rice to thicken the porridge. Also, be careful not to burn the rice. Stir constantly until it is lightly toasted and aromatic--just a few minutes.

Add the water and bring to a boil over medium heat. Starting with cold water and boiling over medium heat (as opposed to high heat) will yield a lighter, cleaner soup.

Once the porridge boils (be patient, this will take a while), lower the chicken in and tie the cheesecloth to the handle of the pot, so the bird doesn't sit on the bottom and burn.

Vent the pot with a pair of chopsticks by balancing the chopsticks on opposite ends of the pot. Point one toward you, and the other away from you, then rest the lid on the chopsticks. (Bowien notes: "My cooks used to burn this porridge because they thought they knew a better way to vent the pot, but this is the way grandmothers do it. Trust me." We note: this method works perfectly. It both vents the pot and catches the condensation. The result is an ideal cooking temperature and maximum flavour.)

Cook at medium heat for 45 minutes to an hour. The rice should be very soft but not completely exploded into mush. Pull the chicken out and shock it in ice water. Once it's cooled, you can slide it and use it as a garnish or any other application that calls for a nicely poached chicken. Because that's exactly what you get: a nicely poached chicken with hints of rice flavour.

Season with fish sauce and salt. Bowien suggests: "Garnish with chopped cilantro, sesame seeds, an egg yolk, and your choice of toppings--smoked eel, ikura, uni, whatever."

Bowien claims that this recipe produces "4-6 servings," but, in fact, it makes enough for at least 12.

Bread & Tomatoes

 
fig. a:  Sunday morning loaves

fig. a: Sunday morning loaves

Semolina-Sesame Loaf

20% semolina (preferably semola rimacinata, an extra-fine “re-milled” or twice-milled Italian variety)

80% bread flour

15% levain

85% water

2.5% sea salt

3.0% toasted sesame seeds

fig. b:  levain landscape

fig. b: levain landscape

This semolina-sesame loaf has been my latest obsession over the last couple of weeks. It was inspired by the semolina loaves that were a specialty of some of the truly old-school Italian-American bakeries of New Jersey back in the day. For a while, I worked in a wine store in Northern Virginia that used to import dozens of loaves of bread from Jersey every Thursday. I got pretty hooked on the flavour at the time. Those loaves tended to have sesame seeds generously sprinkled on top. In this case, I put an especially generous amount of toasted sesame seeds inside the loaf.

Yesterday, I celebrated the arrival of my latest batch of semolina-sesame bread by making a somewhat old-school spaghetti dinner with lots of garlic and a couple of anchovies in the sauce. I wanted to have something that was saucy and savoury, something that would need some sopping up, something that was just begging for a freshly baked loaf of crusty bread.

This time of year, fresh tomatoes that have any flavour to them are a little hard to find, for reasons that should be obvious. Therefore, from the tail end of fall until the early days of summer, I tend to seek out the tastiest canned tomatoes I can find for many of my home cooking projects, including the making of tomato-based pasta sauces. Without being ridiculous, use the best tomatoes you can afford. Spending a few bucks on a can of tomatoes might seem extravagant to some, but, unless you grow your own, the best fresh tomatoes can also be pricey (rightfully so, in most cases), and a good can of tomatoes packs a lot of potential into its tight, tinned confines.

If you happen to be in the States, keep your eyes open for these sweet, delicious Stanislaus 74-40 tomato filets from California. (They’re worth buying for their anti-Brand X propaganda alone!).

fig. c: 74-40 or bust!

fig. c: 74-40 or bust!

If you’re in Montreal, it’s nice to see that Bianco DiNapoli’s phenomenal canned tomatoes—also from California, but this time organic, too!—are readily available.

I like breaking open an extra-large can like the one you see above and then parceling its contents in a variety of ways for a variety of different projects, at least one of which will usually be a pasta sauce of some kind. The one I made yesterday was quick, easy, and super-satisfying:

Simple Umami-Rich Pasta Sauce

1 28-ounce can canned tomatoes (or equivalent), crushed by hand in a bowl

a generous glug of extra-virgin olive oil

1-2 oil-packed anchovies (preferably packed in olive oil)

1-2 medium to large cloves garlic, minced

1 generous pinch crushed chile flakes

salt to taste

Heat your olive oil over medium-low heat. When your olive oil is warm, add the anchovies and stir with spoon until they have broken down and melded with the olive oil. Add the chile flakes and cook 15-30 seconds, until aromatic. Add the garlic and cook for another 15-30 seconds, until the garlic becomes aromatic and it takes on a hint of golden colour. Add the tomatoes with all their juices and simmer for 20-30 minutes over low heat. Season to taste with salt before serving.

Serve over spaghetti, with freshly grated Parmesan, some garlicky homemade breadcrumbs (if you got ‘em!), and some freshly torn basil leaves.

When you serve this sauce with pasta, don’t be stingy. There should be a little sauce left in the bottom of the bowl that’s calling out for a crusty bread.

Of course, crust isn’t everything. There’s also something to be said for structure, and for a tender, flavourful crumb, like these two specimens:

fig. d:  semolina-sesame crumb #1

fig. d: semolina-sesame crumb #1

fig. e:  semolina-sesame crumb #2

fig. e: semolina-sesame crumb #2

Using semola rimacinata instead of standard semolina is one of the big reasons the crumb on this loaf is particularly tender and fine. Plus, semola rimacinata is a great product to have around the house—it’s fantastic for making homemade pasta.

Anyway, although they’re hard to see, there’s plenty of flavour-packed toasted sesame seeds in this loaf, which only add to the taste sensation. I used to toast my sesame seeds myself, but it was a bit of a hassle, especially because sesame seeds are delicate and easily scorched if you don’t watch them carefully. These days I just buy large bags of Japanese toasted sesame seeds—we use them all the time when we cook Japanese dishes, and they’re perfect for bread baking.

This bread is delicious on its own, phenomenal with butter, and simply crazy with red sauce.

aj

What We Need Now 1: Pan Pizza

 
fig. a: The Joy of Pan Pizza

fig. a: The Joy of Pan Pizza

I’m definitely not the first person to point this out, but what we need now are simple, satisfying recipes; recipes that don’t require a bunch of obscure ingredients, but instead feature items that can be easily found at your local supermarket, green grocer, or co-op; recipes that actually turn out well (exceptionally well) and that are rewarding to make.

And if these recipes should have a touch of nostalgia to them, all the better.  

Enter pan pizza.

So much of the literature on pan pizza—and, believe me, there is a fairly extensive body of literature on the topic—is dripping with nostalgia.  Almost literally so.  There’s a real obsession with trying to recreate those buttery, decadent crusts of yore, topped with excessive amounts of gooey cheese, and lots of piping-hot, slightly sweet tomato sauce—the ones that you cherished as a child.  The ones you may still cherish today.

While my family definitely ate a considerable amount of pizza, I didn’t grow up in a pan pizza household.  I never had that powerful association with Pizza Hut and its ilk that so many others had.  I wasn’t entirely averse to the pan pizza thing—its charms were pretty obvious to me—but, for better or for worse, other types of pizza exerted a stronger influence on me.

All of which is to say, that when I got interested in making pizza at home a number of years ago, I gravitated toward other styles:  mainly Neapolitan (or rather, Neapolitan-esque), New York-style (or what might more accurately be described as New York-ish), some approximation of Bay Area pizzas we’d admired in the past, and sheet pizzas that mimicked those of Sullivan Street Bakery.  Even though I often read about pan pizza with interest, it took me years to actually get around to trying one of these new-school, homemade pan pizza recipes out.

Big mistake.

When I began to experiment with pan pizza a couple of years ago I quickly realized that these were among the very easiest, most consistently excellent, and most satisfying home pizza recipes out there.  They didn’t require ingredients that were difficult to find, and you didn’t need a pizzaiolo’s touch or a whole lot of fancy equipment.  Hell, you didn’t even need a pizza peel (or some kind of substitute for one), you just needed a 10-inch skillet, preferably cast-iron.

fig. b:  Look, Ma, no peel!

fig. b: Look, Ma, no peel!

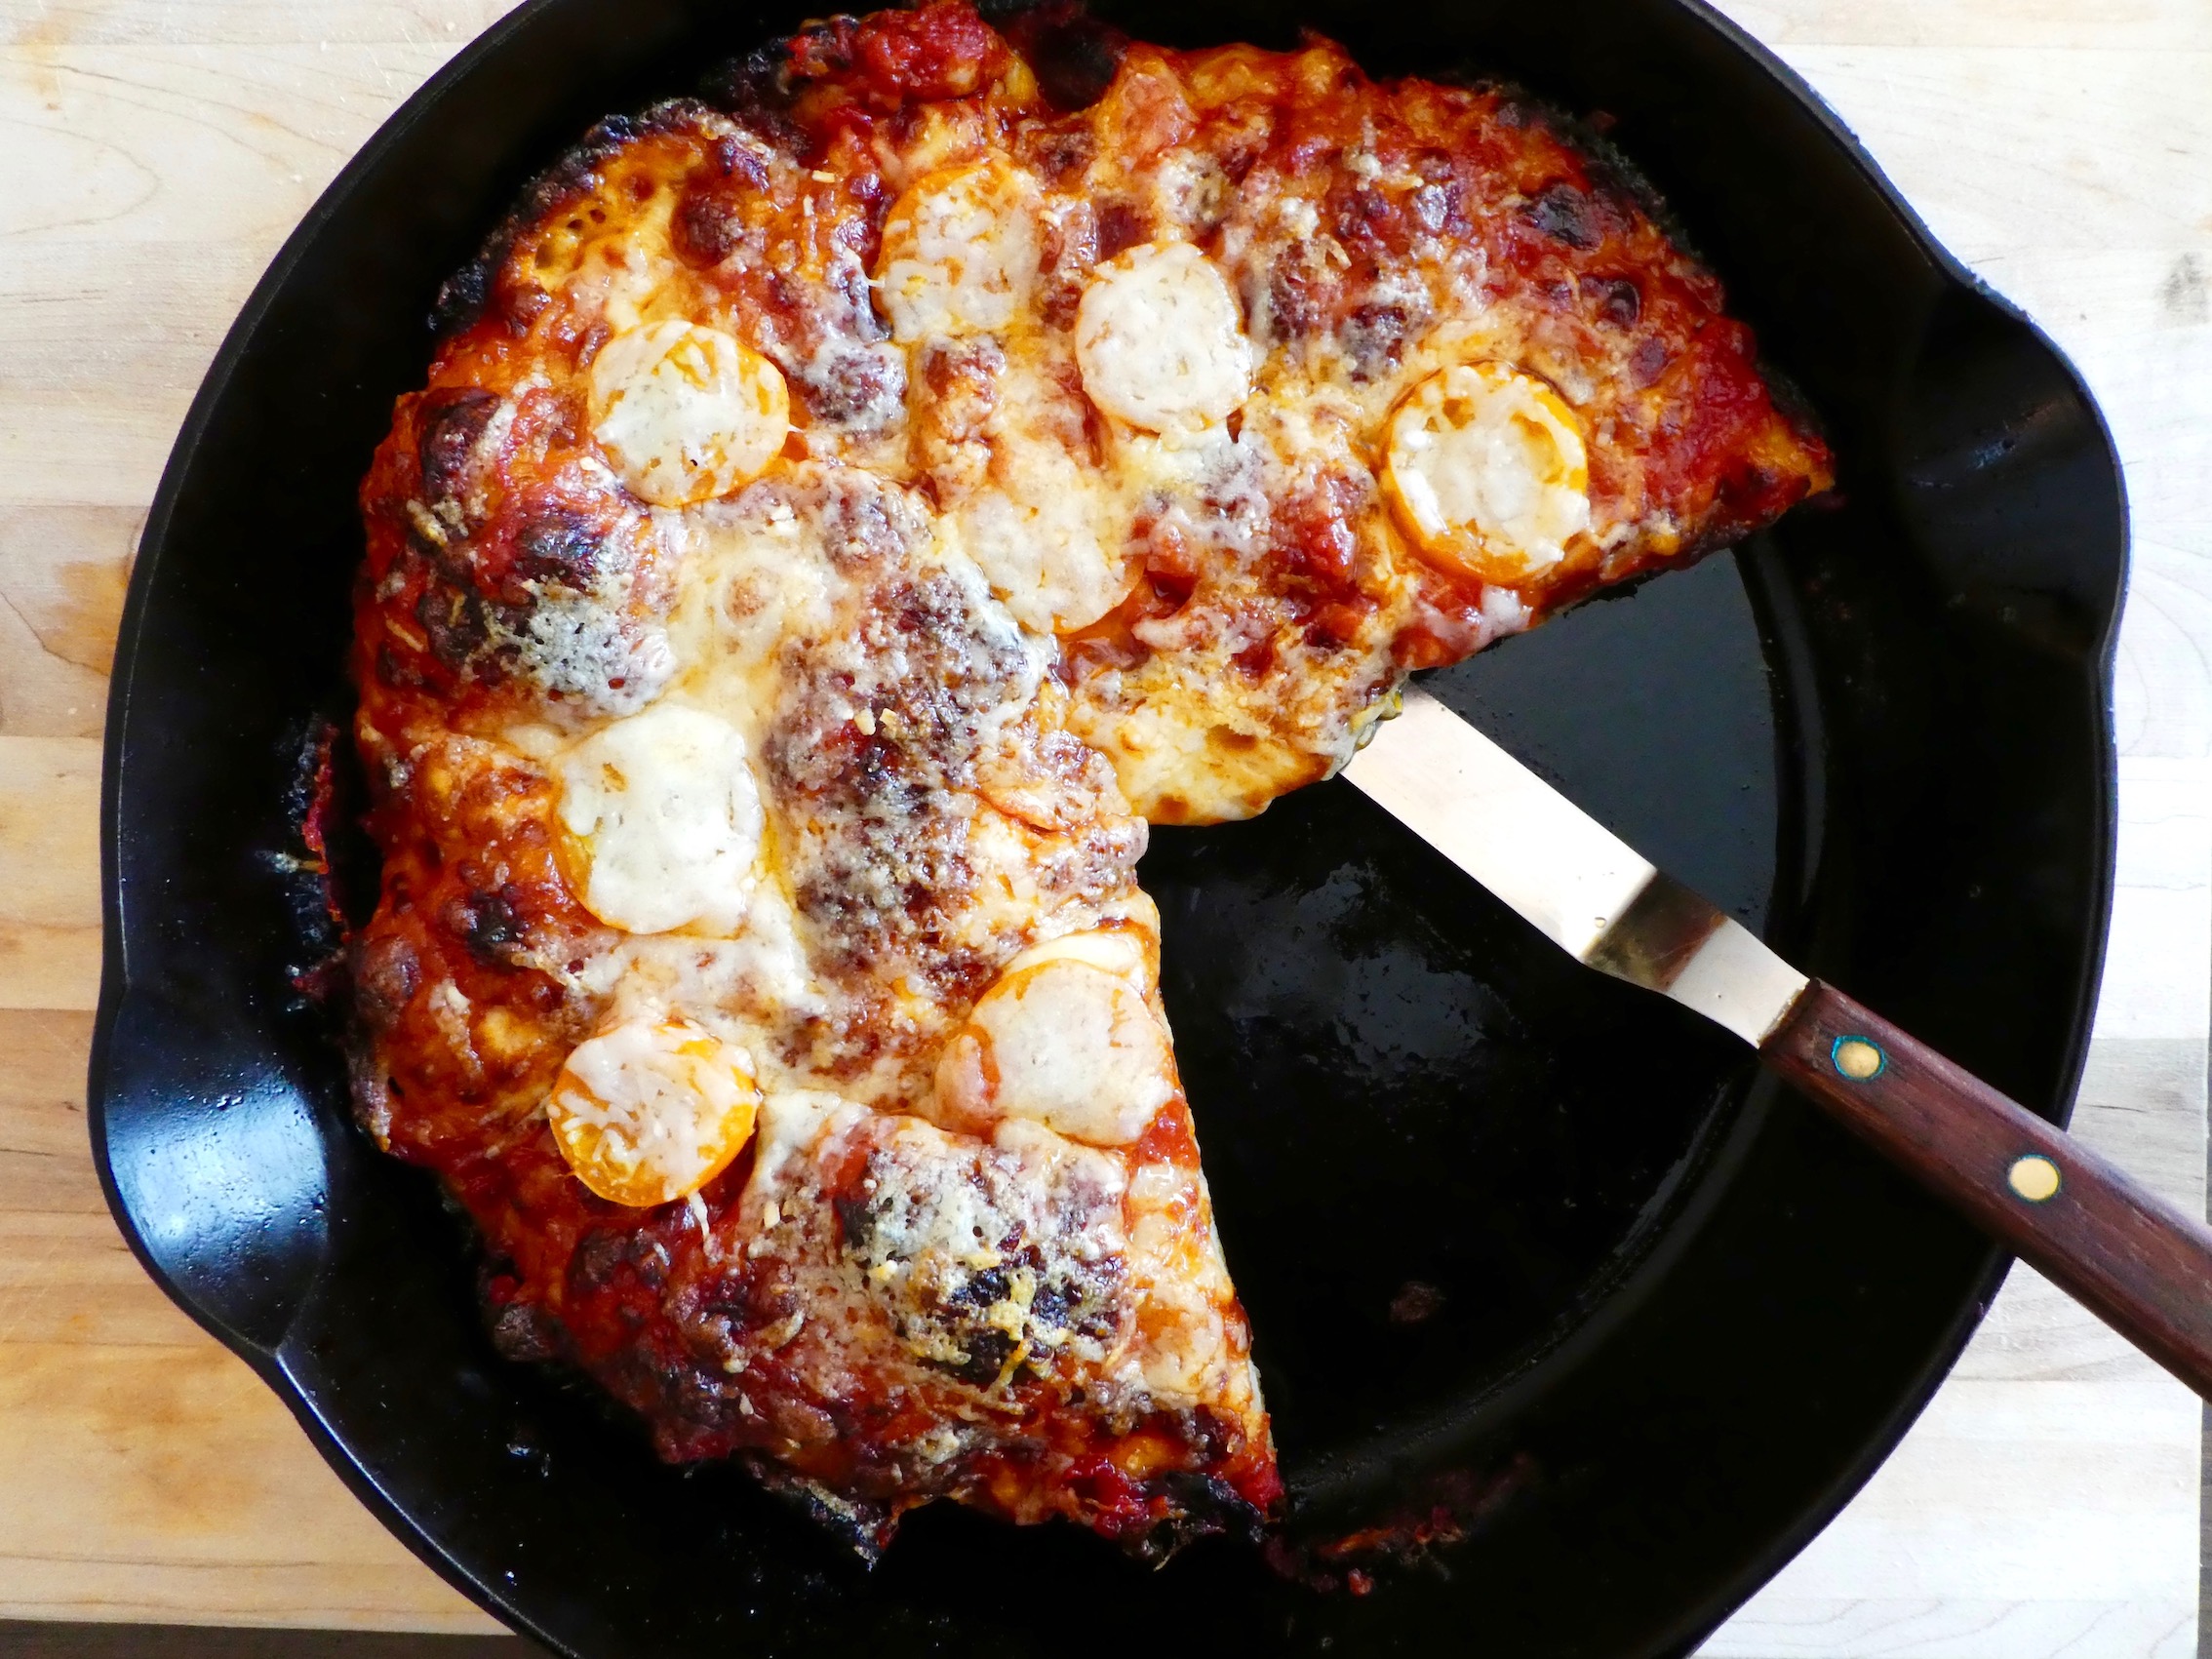
My go-to pan pizza recipe is actually a mash-up of two popular recipes that have appeared online in recent years:  one from Serious Eats, and the other from The New York Times Magazine.

The dough recipe comes from J. Kenji López-Alt, it’s incredibly easy to make, and, even better, it’s foolproof—or as close to foolproof as a recipe can be. In fact, that’s what it’s called: Foolproof Pan Pizza Recipe.  The only investment needed is time.  I typically start the process late at night, before I go to bed.  This step takes mere minutes.  The next morning I form my dough balls.  Again, this step takes no more than 10-15 minutes (tops!).  And by late afternoon/early evening, my pizza dough is ready to go—the only thing is that you need to allow 2 hours for your dough to temper and come to room temperature.  Once your dough has tempered, you’ll find it incredibly easy to handle and stretch.  You’ll also find it very much alive.  Twenty to twenty-five minutes later, you’ll be pulling piping-hot pan pizza from the oven—quite likely, the lightest, tastiest pan pizza you’ve ever tasted.  Sounds do-able, right?

Kenji’s accompanying sauce recipe is perfectly excellent.  But even better, in my opinion, is a sweeter, somewhat more decadent sauce developed by Anthony Falco of Roberta’s.  It, too, is foolproof—or as close to it as imaginable—and its Bit-o-Honey finish is the ultimate flavour sensation with these crispy, chewy, buttery, and wonderfully gooey pies.

J. Kenji López-Alt’s Seriously Foolproof Pan Pizza

400g bread flour, plus more for dusting

10g kosher salt, plus more for sprinkling

4g instant yeast

275g water

8g extra-virgin olive oil, plus more to coat pans and for drizzling

1 1/2 cups pizza sauce (such as Anthony Falco’s Pan Pizza Sauce [see below])

12 ounces grated full-fat, low moisture (dry) mozzarella cheese

2 ounces grated Parmesan or Pecorino Romano cheese

1.  Make the pizza dough, keeping in mind that this is a slow-ferment dough that requires over 12 hours to be made properly, and that will benefit from even more time.  (My normal schedule has been to mix the dough late at night before I go to bed.  Form the pizza doughs the next morning.  Wrap them and place them in the fridge to hold all day.  Then remove from the fridge two hours before baking so they can temper at room temperature [see details below].)

2.  Combine flour, salt, yeast, water, and oil in a large bowl. Mix with hands or a wooden spoon until no dry flour remains. (The bowl should be at least 4 to 6 times the volume of the dough to account for rising.

3.  Cover bowl tightly with plastic wrap, making sure that the edges are well sealed, then let rest at cool room temperature (no warmer than 75°F) for at least 8 hours and up to 24. Dough should rise dramatically and fill bowl. In a hot kitchen, the dough may overproof near the end of that range.

4.  Sprinkle top of dough lightly with flour, then transfer it to a well-floured work surface. Divide dough into 2 pieces and form each into a ball by holding it with well-floured hands and tucking the dough underneath itself, rotating it until it forms a tight ball with a smooth surface.

5.  If you’re aiming to bake some pies in about 2 hours, skip the next step and move on to Step #7.

6.  If you still need some time, place the doughs on a well-floured small rimmed baking tray, cover with plastic wrap, and place in the fridge for several hours (up to 36).

7.  Pour 2 tablespoons oil in the bottom of two 10-inch cast iron skillets. Place 1 dough ball in each pan and turn to coat evenly with oil. Using a flat palm, press dough around the pan, flattening it slightly and spreading oil around the entire bottom and edges of the pan. Cover tightly with plastic wrap and let dough sit at room temperature for 2 hours (at room temperatures above 75°F, the dough may require less time to rise; at temperatures below 65°F/18°C, it may require more time). After the first hour, adjust an oven rack to the middle position and preheat oven to 550°F (290°C).

8.  After 2 hours, dough should be mostly filling the pan up to the edges. Use your fingertips to press it around until it fills in every corner, popping any large bubbles that appear. Lift up one edge of the dough to let any air bubbles underneath escape, then repeat, moving around the dough until there are no air bubbles left underneath and the dough is evenly spread around the pan.

9.  Top each round of dough with 3/4 cup sauce, spreading sauce to the very edge with the back of a spoon. Sprinkle evenly with mozzarella cheese, all the way to the edges. Season with salt. Drizzle with olive oil.

10.  Transfer pan to oven and bake until top is golden brown and bubbly and bottom is golden brown and crisp when you lift it with a thin spatula, 12 to 15 minutes. Immediately sprinkle with grated Parmesan or Pecorino Romano cheese, if using. Using a thin spatula, loosen pizza and peek underneath. If bottom is not as crisp as desired, place pan over a burner on your stove and cook on medium heat, moving the pan around to cook evenly until it is crisp, 1 to 3 minutes. Remove the pizzas and transfer to a cutting board. Cut each pizza into 6 slices and serve immediately.

Now that we’ve learned to make the dough and bake the pizza, it’s time to hit the sauce.

Anthony Falco’s Pan Pizza Sauce

2 tablespoons olive oil

1 clove garlic, peeled and minced

2 tablespoons tomato paste

Pinch of chile flakes, to taste

1 x 28-ounce can whole San Marzano tomatoes, crushed by hand

2 tablespoons honey

1 teaspoon kosher salt, or to taste

Place a saucepan over medium-low heat, and add to it 2 tablespoons olive oil. When the oil is shimmering, add the minced garlic and cook, stirring, until it is golden and aromatic, approximately 2 to 3 minutes.

Add the tomato paste and a pinch of chile flakes, and raise the heat to medium. Cook, stirring often, until the mixture is glossy and just beginning to caramelize.

Add the tomatoes, bring to a boil, then lower heat and allow to simmer for 30 minutes, stirring occasionally.

Take sauce off the heat, and stir in the honey and salt, to taste, then blend in an immersion blender or allow to cool and use a regular blender.

Use as directed.

Okay, now that we’ve covered the basics, feel free to get creative. 

Personally, I like my pan pizza pretty simple and basic:  dough + sauce + cheese, with maybe some chili flakes, or some hot sauce, or some hot honey added at the last second, just before I’m about to chomp my still-blistering-hot slice. 

Pepperoni is considered by many to be a classic variation, especially by contemporary hot honey enthusiasts, but I never make it at home. 

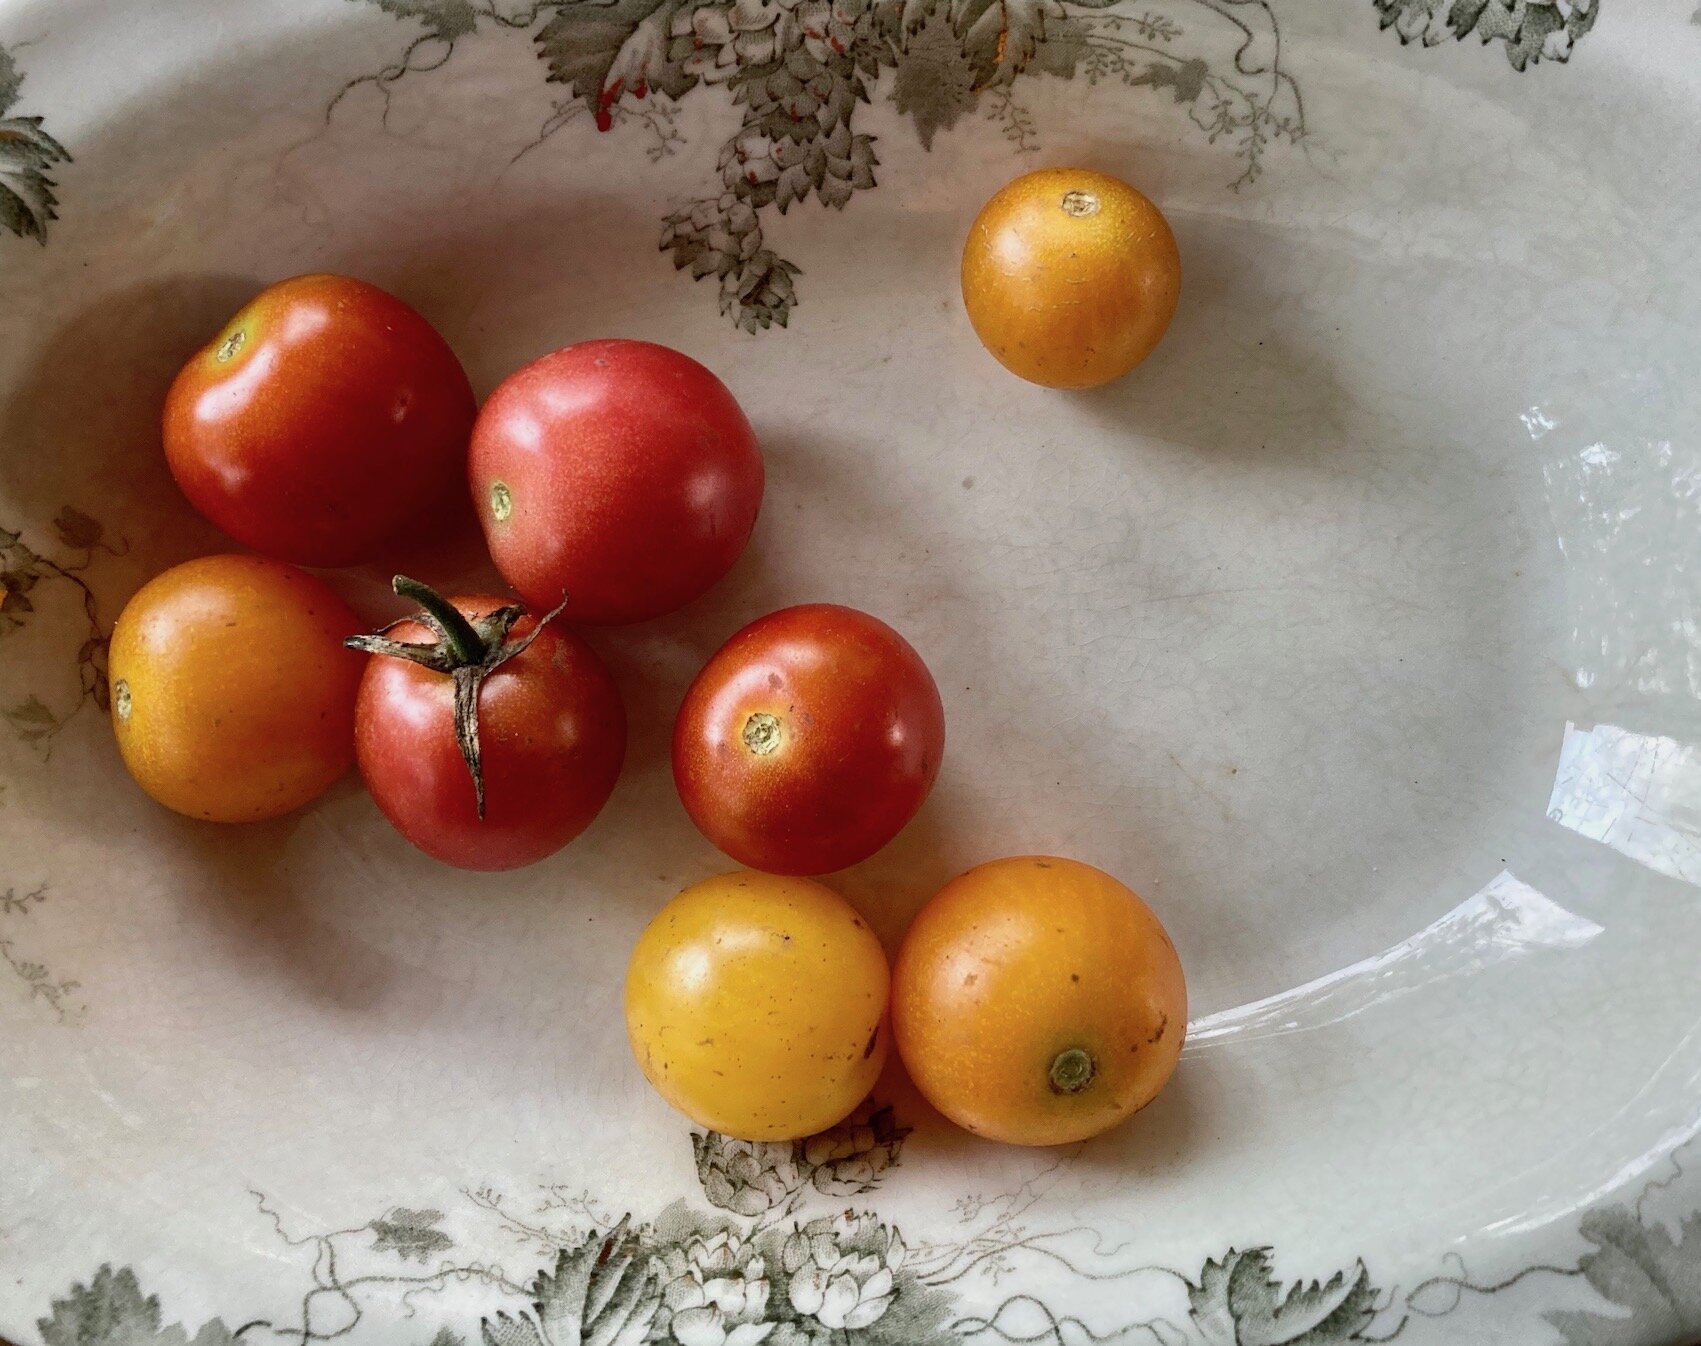
What I will highly recommend is a version that’s still very much possible RIGHT NOW, while you can still find choice local cherry tomatoes around. 

fig. c:  How ‘bout them tomatoes?

fig. c: How ‘bout them tomatoes?

It’s super simple.  It just involves adding cherry tomato slices to a basic tomato-cheese pie, but if you source the right tomatoes, and you’re the kind of tomato fanatic that I am, they will take your pan pizza into the stratosphere.  Plus, it’s got a cute name.

fig. d:  What more do you need?

fig. d: What more do you need?

A.J.’s Tomayto-Tomahto Pan Pizza

Additional topping:

4-5 fresh, locally grown, organic cherry tomatoes (the sweetest, tastiest ones you can find) [per pie], sliced

Revised instructions:  

Follow instructions 1-9 to a T.  At that point follow these steps:

10.  Transfer pan to oven and bake until top is golden brown and bubbly and bottom is golden brown and crisp when you lift it with a thin spatula, 12 minutes. Remove from oven.  Distribute cherry tomato rounds evenly, pressing them gently into the molten cheese, while being careful not to press too hard, thereby scalding yourself.  Sprinkle with grated Parmesan or Pecorino Romano cheese. Return to oven and bake for another 2-3 minutes, until tomatoes are golden-brown and Parmesan or Pecorino is also bubbling wildly.  Using a thin spatula, loosen pizza and peek underneath. If bottom is not as crisp as desired, place pan over a burner and cook on medium heat, moving the pan around to cook evenly until it is crisp, 1 to 3 minutes. Remove the pizzas and transfer to a cutting board. Cut each pizza into 6 slices and serve immediately, keeping in mind that this pizza is a hot, molten, delicious, but dangerous mess at the moment.  Be careful.  Proceed with great anticipation, and an ounce of caution.

You’re all set.  

What more do you need?

aj


Make Mine a B.L.T. (or even "just" an L.T.), or In Praise of the B.L.T. (and the L.T.)

 
fig. a:  Can you see where this is going?

fig. a: Can you see where this is going?

We love sandwiches of all kinds, of course—lobster rolls, hoagies, smoked meat, club, po’ boys, muffulettas, chopped rib, falafel, burgers, even the lowly P.B. & J.—but there’s one sandwich that stands above them all at this time of year, when tomatoes are plentiful and at the peak of perfection, and that’s the B.L.T.

All the constituent elements of the B.L.T. serve their purpose and hold importance—including the bread, mayonnaise, bacon, and lettuce—but as far as we’re concerned the very most crucial ingredient is the tomato. If you don’t have a perfect tomato to start with, really, what’s the point? You could make the most beautiful mayonnaise from scratch, fry up the smokiest, most delicious artisanal bacon, source the sweetest, most tender-crunchy lettuce leaves, and even bake the most perfect sandwich bread imaginable (or find it at your local artisanal bakery), but if the tomato was unripe and tasteless, the whole contraption would fall apart.

Lucky for us, we’ve been able to score loads of beautiful, juicy, ripe local tomatoes recently, we have access to our favourite Northeastern bacon (North Country Smokehouse, out of Claremont, New Hampshire), and we’ve even been able to find local, organic iceberg lettuce—in other words, the B.L.T. trifecta. We’re a little less obsessive when it comes to the bread and mayonnaise. We bake plenty of our own bread and make our own mayonnaise with regularity, but we’re perfectly fine with using supermarket brands when it comes to these two elements. Recently, we’ve been fond of using Hellmann’s mayo and Pepperidge Farm’s Butter Bread or Honey White.

But it’s the tomato we’re most particular about. And right now, my favourite B.L.T. tomato is an heirloom variety known as the Paul Robeson.

fig. b: Paul Robeson puts on quite a show

fig. b: Paul Robeson puts on quite a show

The Paul Robeson is a variety of Russian origin that was named in honour of the African-American singer, actor, and activist—”a sandwich tomato with a tang, an extraordinary tomato for an extraordinary man,” as the folks at Fedco Seeds put it.

You don’t have to use an heirloom variety, of course, but for a true B.L.T., it’s imperative to use a big, juicy, supremely tasty slicing tomato. Delicious cherry tomatoes will do in a pinch, but for the full effect, it really has to be a slicer that’s just bursting with juicy goodness. All the greatest sandwiches are messy affairs—or at least they should be—and the B.L.T. is no exception. Your plate should be a glorious mess when you’re done. Napkins and paper towels should be an absolute necessity. Possibly even a shower.

Lastly, the bread must be properly toasted. It should be slathered with mayonnaise. (I’m a strong proponent of mayonnaise being slathered on both slices of toast.). And it’s absolutely obligatory that the tomatoes be salted in advance of sandwich construction. Okay, maybe it’s not “obligatory,” especially if you’re using a salty bacon, but, personally, I think the salt really helps release the tomato’s full range of flavours.

Now, as much as I love a true B.L.T. made with excellent bacon, we don’t always have bacon around. In fact, most of the time we don’t. Mostly it’s reserved for “special occasions.” But that’s okay, because if the tomatoes are exceptional, I get nearly as excited about an L.T. sandwich as I do about a B.L.T. And that’s actually the sandwich we have with the greatest frequency during peak tomato season. (If you’re really missing the salt & smoke of those crispy bacon slices, you could always sprinkle a little smoked salt on your tomatoes in place of your usual sea salt or kosher salt. You won’t get quite the same texture, and you won’t have the intoxicating presence of bacon fat adding to the alchemy, but at least you’ll get some of that smoky saltiness.)

And while I’m a big fan of mayonnaise, and I realize it’s almost heretical to say so, I’m also perfectly fine with a mayo-less L.T. sandwich made with a vinaigrette—as long as the tomatoes are excellent.

But the version I love the most is that classic version—the one with the perfect tomatoes, the choice bacon, and the proper lettuce, bread, and mayonnaise combo. Especially if it’s served sliced on the bias.

fig. c:  B.L.T. lunch

fig. c: B.L.T. lunch

Preferably with a cold beverage and some potato chips.

One friend who joined us for a socially distanced B.L.T. lunch earlier this summer called the A.E.B. version “the Platonic ideal of the B.L.T.” The last time Michelle finished one, she just said (in typical Michelle fashion), “Man, that was really, really good.”

All I know is that this is the meal that I crave the absolute most right now. I’ve been having at least four B.L.T. and/or L..T. sandwiches per week for the last several weeks now (usually L.T.s, actually), and each and every one has been just as satisfying as the last. Usually more so.

aj